A Sterling Plumbing Blog
Plumbing Articles from Columbus, OH
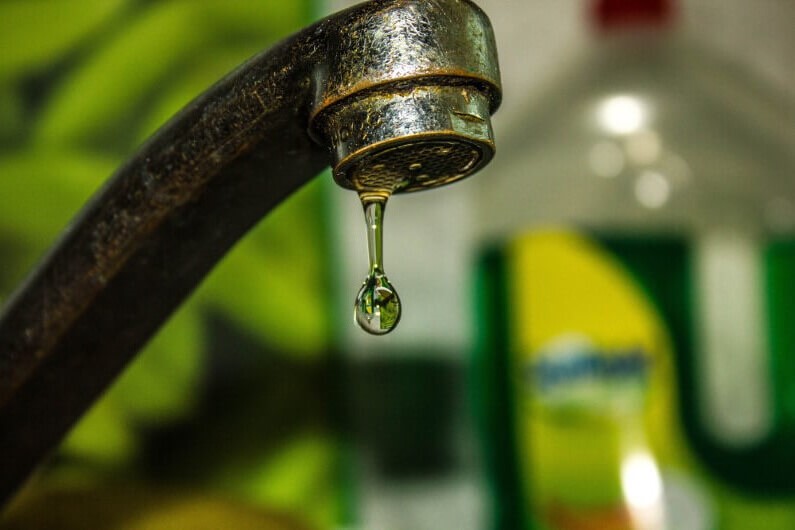
Drip, Drip Drip…. 4 Ways to Fix a Leaky Faucet

Does the plip, plip, plip of a dripping faucet keep you awake at night? Is water oozing out of your faucet handles? If you have a leaky faucet, here’s how to tackle a repair job.
Before You Start
Collect Basic Supplies
You may need any of the following to repair your leaky faucet:
- flat-head screwdriver
- Phillips screwdriver
- hex wrenches
- tongue-and-groove pliers
- needle nose pliers
- crescent wrench
- adjustable wrench
- tape to wrap around plier heads (this will keep the pliers from scratching the plumbing equipment)
- plumber’s grease
- camera for documenting how the parts are positioned and what steps you take as you remove them. Use these as a guide when you reassemble the faucet.
Go to the Supply Store
When you’re replacing pieces of your faucet, you need to get an exact match for the part you’re replacing.
If you want to buy parts ahead of time, locate the paperwork that came with the faucet or look for the faucet model number. Another option is to buy a general kit. For instance, a “faucet repair kit” will contain an assortment of washers for a job such as repairing a compression faucet.
If you can’t buy the parts before you start, allow yourself plenty of time to go buy parts during the leaky faucet repair job. If you take the used washers, rings, or cartridges you need to a supply store, the salespeople can help you find or order the right replacement parts.
Shut off the Water
Look under the sink to find the valves for shutting off the water. (Many valves have a football-shaped handle.)
Prepare the Sink
Close the sink stopper or lay a rag in the sink to catch any small pieces that fall into the sink.
Fixing the Leaky Faucet
There are four types of faucets: compression, ball type, cartridge, and ceramic disc.
1. Compression
Compression faucets usually have two handles, one each for hot and cold water. Twisting the handles to loosen them lets water flow, while tightening the handles shuts off the water flow. Each handle has a rubber washer at the base which acts as a seal. When the washer wears out, the faucet starts leaking.
To repair a compression faucet:
- Shut off the water.
- Remove the decorative cap from the top of the handle, if there is a cap. You can usually pop or pry it up with a flat-headed screwdriver.
- Unscrew the handle with a Phillips screwdriver. Once the screw is completely loose, pull the handle off of the faucet.
- If there is a cover over the valve stem assembly, use pliers to remove it.
- Remove the valve assembly. Use pliers or a crescent wrench to loosen the hex-nut section. Once the valve assembly has been entirely unscrewed, pull it out.
- Remove the washer at the bottom end of the valve assembly. Use a small flat-blade screwdriver to remove the brass screw that holds the washer in place. Once this is unscrewed, pry the rubber washer way from the assembly. Clean the end of the assembly.
- Insert a new washer and coat the washer with plumber’s grease. Replace the brass screw.
- Pull the stem out of the packing nut and replace the O-ring. Coat the O-ring in plumber’s grease.
- Put the valve stem back into the faucet and tighten it.
- Replace the handle and screw it in. Replace the cap.
- Check the faucet for leaks.
2. Ball-type Faucet
A ball-type faucet has a hollow ball that rotates in a socket to let water flow through or stop the water.
You’ll need to buy a replacement kit for this type of leaky faucet repair. It contains all the necessary parts.
To repair a ball-type faucet:
- Shut off the water valve.
- Lift the handle and loosen the screw with a hex wrench. Lift the handle away from the faucet.
- Use pliers to unscrew the cap by turning it counterclockwise.
- Remove the cam (a ring that sits on top of the ball). Lift out the ball.
- Replace the ball if it looks scratched, cracked, or worn.
- Use a screwdriver to lift out the small rubber seats (rings) and the springs underneath. Notice how they are placed as you remove them. Install the new seats and rings in exactly the same positions.
- Replace the ball, aligning the keyway with the tab inside the faucet body.
- Install a rubber gasket and replace the cam cap on top of the ball. Make sure that the keyway on the cap aligns with the corresponding slot.
- Tighten the cap assembly.
- Tighten the nut against the ball.
- Test for leaks.
3. Cartridge
In a cartridge faucet, the cartridge contains all the valves that manage the water flow. You may have to repair the whole cartridge when fixing this faucet.
To repair a cartridge faucet:
- Shut off the water valve.
- Remove the faucet handle. You may have to use an Allen wrench to loosen a set screw on the side of the handle. Or you may need to pry off a decorative cap to reveal a screw that needs to be loosened with a Phillips wrench. Pull the handle off.
- Use a pipe wrench or tongue-and-groove pliers to unscrew the cartridge retaining nut and remove it. If there is a brass screw at the top of the cartridge, keep it in case you need it for the new cartridge.
- If you just need to replace the O-rings, cut them away from the cartridge. Put on the new O-rings and coat them with plumber’s grease.
- If you are replacing the whole cartridge, apply plumber’s grease to the O-rings and slide the new cartridge into the faucet.
- Reassemble the faucet.
- Test for leaks.
4. Ceramic Disc
A ceramic disc faucet has a cartridge containing discs that slide back and forth to create a seal. If the faucet is leaking, you may need to remove the cartridge and clean the seals, or you may need to replace the discs inside the cartridge.
To repair it, you’ll have to remove the cartridge and either clean and replace the seals or replace the discs. You do not usually need to replace the whole cartridge.
To repair a ceramic disc faucet:
- Shut off the water valve. Turn on the faucet to drain the water.
- Look for a tiny screw on the back of the handle that you can loosen with a hex wrench. Remove the screw and remove the handle. (If you can’t find a screw under the handle, it may be under the counter below the faucet instead.)
- Use tongue-and-groove pliers to loosen the cartridge.
- Remove the cartridge. If it doesn’t come loose when you pull on it, lift it out with the pliers.
- Pull the neoprene seals out of the bottom of the cartridge.
- Clean the seals and bottom of the cartridge to remove sediment and buildup. You can do this with a toothbrush, with vinegar and a scouring pad, or with vinegar and baking soda. If the seals can’t be cleaned, you’ll need new ones.
- Replace the clean seals.
- Put the cartridge back in the faucet. Reattach the handle.
- Turn the handle to the “on” position and turn on the water slowly. Check for leaks.
When to Call A Professional
If these steps seem too difficult, or if your repair still results in a leaky faucet, it may be time to call a professional. We offer affordable, quality service, and we come out for same-day appointments when available. Whether you need us to stop the dripping or to finish the repair job you’ve started, contact us.
Schedule a Job Quote
Serving Columbus, Grove City, Gahanna, Reynoldsburg & Surrounding Area's
FREE ESTIMATES
a. sterling plumbing
Full Service Plumbing Columbus, Ohio
A Sterling Plumbing Sewer & Drain
3555 Groveport East Rd
Columbus, OH 43207
(614) 332-6656
or Send Us an Email Here.
© 2018-2024 ASterlingPlumbingColumbus.com
– All rights reserved. –
Information on this website may not be re-used without prior written consent from A Sterling Plumbing.
HOURS & LICENSE INFO
Monday-Friday: Open 24 Hours
Saturday: Open 24 Hours
Sunday: Open 24 Hours
Ohio Licensed, Bonded, Insured
OH Plumbing Contractors License # OL-26324


0 Comments